The story of Patch 11.1 in World of Warcraft: The War Within leads to the Liberation of Undermine raid. If there is to be peace in Undermine, Gallywix has to be dealt with once and for all. This is the first Goblin-themed raid in World of Warcraft, and it is filled with explosions and dangerous technology. The entrance to Liberation of Undermine is right next to the open door of the Intercontinental Hotel. Players will find a unique set of challenges never encountered before in this game, and there are many rewards that can be obtained both in the raid and through the Gallagio Loyalty Rewards Club Renown. Here is how you can beat all eight bosses in Liberation of Undermine. All bosses tactics and strategies below are for Normal difficulty.
3:01

Related
The Best Games To Play If You Like World Of Warcraft
Looking for something similar to World of Warcraft? Then check out these RPGs.
How to Beat Vexie and the Geargrinders

After killing all the trash mobs at the start of the raid, immediately run back towards the Intercontinental Hotel. When the boss arrives in the arena, she will instantly kill any player caught in her path. This fight consists of two phases. The tanks should keep the boss positioned against the wall of fire at the edge of the arena. The Geargrinder has four stacks of a buff called Protective Plating. If the boss still has stacks of this buff when its energy bar reaches 100, your raid team will start taking large amounts of damage and will quickly wipe as healers won’t be able to keep up with it for long.

In order to remove Protective Plating stacks, you will need to kill the adds that spawn, take their bikes, and run them into the boss. Each direct hit will remove a stack of Protective Plating. Make sure to stay out of the lines that indicate where the adds are moving toward. Once the adds crash into the wall, quickly kill them and have the DPS get on the bikes and use the extra action button that appears. While the bike is casting its ability, take this time to aim it so that it will hit the boss.
During phase one, there will be several things that players will need to be aware of:
- Healers should be ready to heal the Tank when they get hit by Tank Buster. The second Tank should then taunt while the first Tank gets healed up. If you are the Tank, you don’t want to get hit a second time by Tank Buster while you still have the debuff, as this will do even more damage to you.
- When the boss casts Incindiary Fire, keep moving and stay out of the circles that appear on the ground.
When all stacks of Protective Plating have been removed, phase two starts. During this phase, healers will want to focus on keeping the raid alive through the constant AoE damage going out. DPS and Tanks will focus on doing as much damage to the boss as possible. Aside from spamming AoE abilities, the boss will cast an ability with a channeled 45-second cast time called Tune-Up. When this ability is done casting, the boss will regain its stacks of Protective Plating.
During this time, the boss takes increased damage. So phase two is where you want to use Blood Lust in order to maximize your damage. Don’t get tunnel vision though, as a bunch of adds will move toward the boss. They will assist in the repair process, decreasing the amount of time you have during this phase to damage the boss. DPS should interrupt, stun, CC, and kill these adds as quickly as possible.

Once Tune-Up is done, the boss will shift back to phase one. Repeat the entire process above until the Geargrinder is destroyed. At that point, your group just has to burn down Vexie. She doesn’t do anything, and she will die pretty quickly. At this point, grab your loot, heal up, and get ready for the next boss.
How to Beat Cauldron of Carnage

This is an interesting encounter where you fight two bosses at once in the same spot where the world boss spawns in Undermine. As the encounter starts, make sure to use Blood Lust. During the first phase, both bosses must be tanked on opposite ends of the arena. If Flarendo and Torq are too close to one another, they will become immune to all damage. Divide your raid into two groups, one group for each boss. Each boss will apply a debuff to all enemies within 60 feet of them, and this debuff does progressively more damage over time. Having one debuff is manageable for healers, but having two isn’t, so make sure not to be too close to the boss you aren’t currently fighting.
Both bosses have unique abilities and mechanics, which will be covered before discussing phase two and how/when the groups should switch bosses.
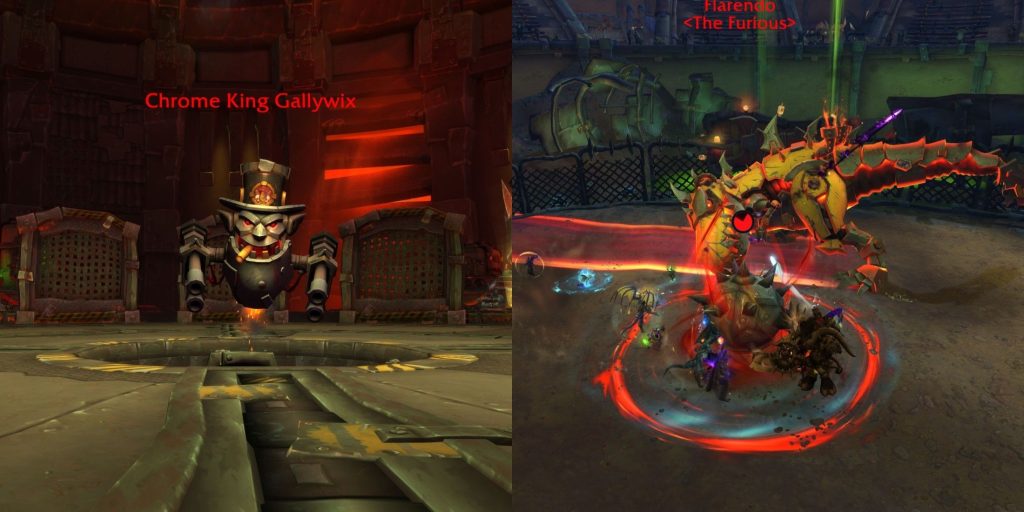
Flarendo

There are two major mechanics that players will need to be mindful of when fighting the large mecha T. rex. Giant bombs will appear with a stack symbol under them. Everyone that is part of the current Flarendo group should stand in this circle to help soak the damage caused by the bomb.
The only exception is the player currently targeted by the laser. This player should run and force the lines to follow them. The best spot is to have the lines facing toward the wall where it won’t hit the Flarendo group or the Torq group. Once the line stops moving, that player should make sure to get out of it as the laser fired off does enough damage to one shot them.
As far as the Tank goes for Flarendo, the main thing they will want to watch out for is Eruption Stomp. Right before this ability hits, make sure to use a defensive cooldown to reduce the amount of incoming damage. The rest of the group will want to watch out for the waves of fire spawned by this ability.
Torq

Fighting Torq is much different from Flarendo. For the most part, you want to avoid moving as much as possible. Each time you move, the bar in the middle of your screen will gradually fill up. If this bar fills up entirely, you will get stunned for six seconds. If you stop moving, the bar will gradually deplete.
Of course, the catch is that you do have to move periodically. Some players will be targeted by Thunderdrum Salvo, which leaves a trail of blue circles on the ground that follow the targeted player. The trick to this mechanic is that you have to side or sttuter step out of each circle to avoid taking damage while also not moving too much. It may take some practice, but you only ever want to be moving in small increments, as getting stunned in the middle of a Tunderdrum Salvo is an almost surefire way to get a repair bill.
Phase Two
While fighting Torq and Flarendo, you will notice their energy bars gradually filling up. When both bars reach 100, the bosses will run towards each other with cinematic flair. During phase two, you will not need to worry about the two bosses being too close. At this point, both groups will switch. The group that was fighting will go to Torq’s side of the room and vice versa. While switching sides, make sure to do as much cleave damage to both bosses as possible.
During this second phase you will also have to dodge a bunch of orange and blue circles that appear on the ground. Healers will have to work overtime to keep the raid alive with all the AoE damage going out during this phase. Phase two ends once the bosses are done casting Colossal Clash. At this point, they go back to their respective sides of the room. Repeat everything from above until the bosses are dead, but try to have them both die around the same time. When one boss dies, the other will enrage.
While this won’t be an issue if the surviving boss has a couple million health left and is about to die, this can be problematic if one of the groups falls behind on DPS. Eventually, the raid boss will be doing too much damage to keep up with and the group will wipe, so try to keep damage as even as possible across both bosses to avoid this situation.

Related
World of Warcraft’s Abandoned Profession Deserves a Rebirth
World of Warcraft has recently been paying a lot of attention to its professions, but one of them has been left buried in the dust.
How to Beat Rik Reverb

The next boss, Rik Reverb, is a fairly simple encounter as long as you can master the Amplifier mechanic. Make sure to Blood Lust at the start of the fight, as you will have a little bit of time before mechanics start. The Tanks should position the boss so that it is not facing the group, as his attacks have a frontal cone effect that does a lot of damage. Melee DPS should always make sure to be behind the raid boss and never in front of it. Tanks will need to swap to handle the debuff that is applied by the boss.

Shortly after the fight begins, you will see large orange circles appearing on the ground. A few moments later, an Amplifier will appear in that spot. The Amplifiers will gradually gain energy, and if the bar fills up they will start to do a lot of raid-wide damage. Amplifiers will always spawn under one random ranged player and under the boss. Don’t take the boss too close to an Amplifier, as he will make them gain energy faster.
Keep a close eye on the Amplifiers. If they start to get too close to being full, have one player per Amplifiier right click on the Amplifier and drain its energy. Healers will need to pay attention to who is on an Amplifier, as they will be taking more damage the longer they are on an Amplifier. Before discussing phase two, there are two attacks that players will need to watch out for:
- Faulty Zap: Several players will be randomly targeted by blue circles. Move away from the group until this ability goes off. The healers should heal these players back up as they rejoin the fight.
- Resonant Echoes: A series of small circles will spawn from the Amplifiers and move out toward the edge of the arena. Avoid touching these, as they do damage and have an unpleasant damage over time effect that increases with each circle you touch.

Rik Reverb will enter phase two when his bar fills up. Don’t worry about damage during this phase, as he is effectively immune to damage. Instead, pay attention to which Amplifier has an electric circle around it. The entire group should immediately run toward this Amplifier and stand in the circle. Doing so will send players flying into the air above the ring that shoots out from the boss. You die instantly if you get touched by this ring, so it is imperative that you head to the active Amplifier immediately.
This ring destroys the Amplifier, and then another one will activate. This process will repeat until the boss loops back to first phase. Rik Reverb soft enrages if he reaches phase two a third time, so make sure to kill him as quickly as possible to avoid that.
How to Beat Stix Bunkjunker

Liberation of Undermine stands out for some of its unique boss fights and mechanics, and one of the more memorable fights in this raid would be Stix Bunkjunker. Just like with the previous two encounters, use Blood Lust or other similar abilities at the start of the fight. Tanks will need to taunt swap each time the boss casts Demolish, as it places a debuff on the Tank that increases their damage by 100% for 50 seconds.

Every time Stix’s energy bar fills up, he will cast an ability that spawns garbage all over the arena. At this point, one of the Tanks and several other players will suddenly find themselves on top of a large ball of trash. If this happens to you, you will see a bar appear in the middle of your screen. Start rolling over smaller piles of trash to fill your bar. The more your bar fills, the bigger your trash ball becomes. Once the bar reaches the halfway point, you will be able to roll over larger piles of trash.
When the bar is completely full, there are two things you can do:
- Run the ball of trash into one of the bombs, destroying it before it can blow up on the group.
- Run right into the boss to do a huge amount of damage to him.
Bombs should always be the top priority, so the raid lead should try to communicate when all the bombs are gone. While you are rolling around gathering trash, make sure to run into the adds that spawn as well if your trash ball is big enough.

While all of this is happening, the rest of the raid group will be targeted by an ability called Incinerator. This makes a circle appear under targeted players that does a small amount of damage and then disappears. However, if a player with this circle touches any trash pile, that trash pile will catch fire. Trash that gets lit on fire puts a debuff on all players called Hot Garbage. This debuff stacks and progressively does more damage.

If too many trash piles get destroyed by this mechanic, healers will not be able to keep up with the damage, and it will easily lead to a wipe. Even if it doesn’t cause a wipe, losing too many trash piles means that the trash rollers may not be able to get enough trash to destroy the bombs and then you will wipe.
As mentioned earlier, adds spawn throughout the fight. It is important for the trash rollers to hit these adds, especially the ones who will be hitting Stix. This puts all the adds gathered up into a nice clean pile for melee and ranged DPS to nuke down with AoE damage while still damaging the boss.
As the fight progresses, Stix will cast Overdrive and fly up into the air. Dodge the small circles and the big circle indicating where he will land. When this ability ends, Stix gains a boost to attack speed, spawns an additional large bomb, and will automatically set piles of trash on fire. As a result, this fight becomes more hectic the longer it goes on. Repeat mechanics until he dies.
How to Beat Sprocketmonger Lockenstock

Aside from the mechanics that Tanks need to deal with, a lot of this boss fight boils down to dodging attacks that become progressively more dangerous as the fight goes on. Throughout this fight, sections of the platform will be electrified. You do not want to stand in them.

Focusing on the Tanks first, they will need to taunt swap when the boss casts Pyro Party Pack. The Tank targeted by this should move away from the raid and let the bomb explode before returning. Tanks will also need to swap when they reach five or more stacks of the Gravi-Gunk debuf that increases the amount of damage they take along with slowing their movement speed.

Periodically, random players will be targeted by Screw Up which leaves circles on the ground. A moment later, drills shoot up and stun anyone standing in the circle. The boss will cycle through a series of abilities that players will want to avoid:

- When Blazing Beam is cast, move out of the lines on the ground.
- During Rocket Barage, a series of rockets will appear on the ground and move across the arena. They move in random patterns, so keep a close eye on them and dodge to avoid taking a lot of damage.
- When Mega Magnetize activates, the magnets on the conveyer belt in the middle of the room will pull players toward them. Move against the pull to avoid getting stunned.
There is a gap on both sides of the middle conveyor belts. If you aren’t paying attention and fall into these gaps, you die.
Phase two begins when Sprocketmonger Lockenstock reaches full energy. Every part of the floor except for the conveyor belts will become electrified. The boss will start doing a lot of AoE damage and there will be a bunch of circles on the ground that players will need to dodge. DPS the boss if you can, but focus on staying out of all the circles.

When phase two ends, the boss will do increased damage and one of his abilities will upgrade. After the first cycle, Blazing Beam becomes Void Beam. The main difference here is that the lines you need to get out of become even larger. In the second cycle, Rocket Barrage upgrades to Void Barrage. Multiple abilities will be going off at once, which means you will have even more things to dodge. If the raid group can stay alive through all of that, they will have no trouble beating this boss.

Related
World of Warcraft Patch 11.1 has an Immersion-Breaking Problem
There is something missing from World of Warcraft: The War Within Patch 11.1, Undermine(d), that tarnishes an otherwise excellent content update.
How to Beat the One-Armed Bandit

Yes, this boss is a slot machine. Fitting considering that you are in a casino. The main mechanic of this fight involves taking tokens and inserting them into the One-Armed Bandit to avoid getting killed. Shortly after the fight starts, the boss will spawn three Reel Assistants that will all have a symbol above their head: Flame, Coin, Shock, Bomb. When these adds are killed, they will drop tokens that can be picked up and thrown at the boss by using the extra action button. You have 30 seconds to kill the adds and choose two coins, or the boss will enrage and slaughter the raid group.

The boss will do different things depending on which tokens are used, and it will enrage if a combo is used twice. The following happens with each combo:
- Shock and Bomb: Summons a pylon that spawns adds
- Shock and Flame: Summons a pylon that spews fire
- Coin and Bomb: Summons adds that fixate on players
- Coin and Shock: Summons a pylon that pulls players toward it
- Flame and Coin: Does a lot of raid-wide damage
- Flame and Bomb: Summons large adds that move towards players
Adds will always be the big priority, so make sure to kill them as quickly as possible. If an add is fixated on you, do not allow it to reach you or it will do a lot of damage.
Even with all of this going on, there are still several mechanics that players will need to deal with. When the One-Armed Bandit casts Pay-Line, a blue line will appear on the ground and a large token will come rolling out. If you get hit by the coin you take a lot of damage and are stunned for a few seconds. However, if you are just barely on the edge of being hit by the token when it rolls past you, it will give you a temporary buff that boosts your damage.
The coin will fall over. A player will need to approach it and use the extra action button that appears to get the coin out of the arena. Any coins left over will boost the boss’s damage. Other than the comically large coins, the boss will periodically cast Foul Exhaust. This AoE ability does a large amount of damage and absorb healing.
The tanks will have their own mechanics to worry about. The One-Armed Bandit will use an ability called The Big Hit. This ability hits very hard and leaves an electrified circle on the ground. Tanks will want to taunt swap for each cast of this ability.

Eventually, the boss will enter Phase 2. This phase is a chaotic DPS race where you must kill the One-Armed Bandit before it casts Explosive Jackpot. All the while, you will want to stay out of the energy beams that appear and connect the boss to the pylons as touching them will kill you. The boss will also start casting Hot Hot Heat which fires a beam at two players. Make sure you save Blood Lust for this phase, as you will need the extra damage to beat the timer.
How to Beat Mug’Zee

The second to last boss of Liberation of Undermine is a tough one. Mug’Zee has two different sets of abilities based on which side of the room that players are on. You want to prevent Mug’Zee from reaching full energy, or he will instantly kill everyone. Start on the blue side of the arena first, so have everyone on that side and then pull the boss.

Shortly after the fight starts, two adds will spawn. Have the ranged take out one while the melee and Tanks take down the other one. There will also be bomb adds that you need to worry about. They fixate on random players and don’t take damage, so you will need to have each bomb blown up by having someone run into it. Stagger these out so that you don’t overwhelm the healers with all the raid damage this causes along with a heal absorb effect.

Mug’Zee will also cast an ability that puts a stack marker onto the ground. At least five players need to be standing in this field to keep it from doing a massive amount of damage to the entire group. When this ability goes off, it will also summon an add called Volunteer Rocketeer. This add does a lot of damage and should be killed ASAP. On this side of the arena, Mug’Zee will use Spray and Pray which creates a cone. Move out of this field, as it does a lot of damage to anyone standing in it.
Tanks will need to stand in front of anyone who is targeted by Double Whammy. Without the Tank helping mitigate the damage, this will outright kill anybody it hits.
Keep an eye on the boss’s energy bar. As the bar reaches 90 energy, make sure that you and your group are right near the edge between the blue and red side of the room. By about 95, the entire raid should have moved over. Upon switching sides, Mug’Zee’s energy bar goes back down to zero. On the red side of the room, Mug’Zee will use the following abilities.

The big ability on the red side of the room is Earthshaker Gaol. These circles should not overlap, and the boss should not be in either of them. Have one healer and several DPS join each player targeted by Earthshaker Gaol. When this ability finishes casting, an add called Gallagio Goon will spawn and the players around it will be trapped by stone walls. Players inside will need to dodge the AoE ability while interrupting Pay Respects as much as possible. Anyone outside of the rock walls will want to spread out to avoid stacking the damage from the blue circles that appear.
Mug’Zee will also use Stormfury Finger Gun, which creates a cone and damages anyone inside of it. This cone follows the targeted player, so they will need to stand still so that everyone else can get out of the cone and avoid unnecessary damage.

Just like on the other side of the room, Tanks have their own mechanic to deal with. They will need to taunt swap every time that Mug’Zee casts Molten Gold Knuckles. This causes a debuff that drops piles of molten gold on the ground. If a Tank doesn’t get rid of these stacks fast enough by moving along the edge of the arena, they are stunned for 30 seconds. Just like with the blue side, make sure you switch before Mug’Zee reaches 100 energy.

This process repeats until the boss reaches 40% health. There will be a brief intermission phase. One player will be marked and Mug’Zee will charge at them. He will then follow this attack up with Bulletstorm where he slowly spins and shoots attacks from both hands. You do not want to get hit by either of these fields, so make sure you are in front of or behind the boss and keep moving. Once the boss has done this several times, the intermission phase ends and phase two begins.

When phase two starts, immediately cast Blood Lust. Mug’Zee will use all abilities from both sides of the room at the same time. You won’t be able to reset his energy bar, so you must kill him before he reaches 100. Mug’Zee also casts Blood Lust, increasing his haste by 30%.
How to Beat Chrome King Gallywix

Being the last boss of the raid, Gallywix is easily the hardest boss in Liberation of Undermine. He has a lot of health and is a massive gear check that requires great Tanks, Healers that are capable of performing miracles, and DPS equipped with the best possible gear they can get. This is a three-phase fight, and you will need as much of the group alive as possible at the end.

At the start of the fight, divide the raid into two groups. During phase one, you will want to have the two groups on opposite sides of the room. Tanks will taunt swap after their group is hit by Scatterblast Canisters and healed up through the healing absorb effect. After this, a series of bombs will be placed around the arena. Players will need to get out of these before they explode. Gallywix wil spawn two large bombs with Big Bad Buncha Bombs. Get out of the circles as fast as possible to avoid taking damage.

If a circle appears around you and there is a yellow arrow above your head, move out of the raid group. Tanks will want to stay in melee range of Gallywix, otherwise they will take more damage from his Gatling Cannon attack. Tanks will need to swap to drop stacks of Trick Shots, as it does a significant amount of damage when the debuff drops and does more damage the more stacks you have. Phase one lasts until Gallywix reaches 100 energy, so do as much damage as possible or later phases will be much more difficult to survive.

As phase two begins, a bunch of adds will spawn around Gallywix. Quickly interrupt them and kill them. These adds drop bombs, which need to be picked up with the extra action button and then dropped into the hole in the middle of the arena. You will want to save at least two bombs though, as you will need them for dealing with the Giga Controls on the outside part of the arena. Look for the coil with electrified panels and bring bombs to them. This destroys the controls and prevents Gallywix from using the Giga Control to unleash a powerful attack. If you are unable to stop Gallywix, you will see a large blue beam on the ground that you need to get out of.

There will also be adds that spawn in this phase that the Tanks will need to grab. DPS must kill them as quickly as possible, as these adds do progressively more damage. Periodically, players will need to stack to soak the damage from Fused Canisters.

When the boss reaches 50% health, the floating goblin head merges with the other half of the mech. At this point, you will need to bring his shield and interrupt him before he can finish casting TOTAL DISTRUCTION!!!. While breaking the shield, Gallywix will do a massive amount of raid damage so make sure to use defensive cooldowns to help your Healers keep the party alive.
This starts phase three, which is where you will want to cast Blood Lust. During this phase, Gallywix will cast an upgraded version of Big Bad Buncha Bombs called Bigger Badder Bomb Blast. Fused Canisters is upgraded to Tick-Tock Canisters. Each canister requires two players to soak it, and missing even one can wipe the raid. Healers will want to immediately focus on those who soaked this ability, as they will have a healing absorb effect that will kill them if not dealt with quickly.

On top of that, random players will have three lines shoot out from them. Try to position and then stand still so that the rockets spawned from you don’t hit anybody else. The damage over time effect from these is very nasty. Other than that, this phase is very similar to the second phase. As this phase progresses, more quarters of the arena will get covered in electrity. You do not want to stand in th electricity unless you are trying to get one of the bombs, and even then you will want to pop a defensive cooldown before going into that area. These electric fields act as a soft enrage timer, and if you run out of space before you can kill Gallywix you will wipe pretty soon after that. Throw everything you’ve got at Gallywix, and you will be able to beat him.