Keen to enjoy homemade bread but put off by all the kneading by hand, flouring, and yeast-starting that comes with it? Then using one of our tested bread makers that does the hard graft for you—like the KBS Pro ($150) or Zojirushi Home Bakery Virtuoso Plus ($400)—may just be your ticket to carb heaven. A great way to liven up a club sandwich or add heart to a hot soup, homemade, unprocessed bread not only tastes great but can be easily made in one of the latest bread makers in just a few simple steps.
With a good bread maker, you can produce a generously sized 1-pound basic tin loaf in around four hours from start to finish, which is ideal for slicing up and popping in one of our recommended toasters. Bread makers come with various settings for bread styles beyond your standard loaf too—with French, gluten-free, whole wheat, and sweet options such as banana and date loaf all just a “set and forget it until it’s ready” step away. Some bread machines also have settings for making pizza and pasta dough or fruit jam, which is great if you’re feeling even more adventurous in the kitchen.
“Time and temperature are essential in bread baking, and consistency is one of the biggest variances we face as bakers,” Peter Edris, head baker at New York’s artisan Frenchette Bakery, told WIRED when we asked him how he creates the perfect loaf. “If you want to make good bread, then you need to have the right equipment for the job—invest in a good scale, a good thermometer, and time everything.” Without a team of professional bakery staff on hand, we embraced the shortcut solution to domestic bliss and called in a range of the latest bread makers to test. Here we’ve highlighted our favorite designs, included tips on what to consider before you buy, and shared expert advice on how to get the best from your home bakes.
Power up with unlimited access to WIRED. Get best-in-class reporting that’s too important to ignore for just $2.50 $1 per month for 1 year. Includes unlimited digital access and exclusive subscriber-only content. Subscribe Today.
How Does a Bread Maker Work?
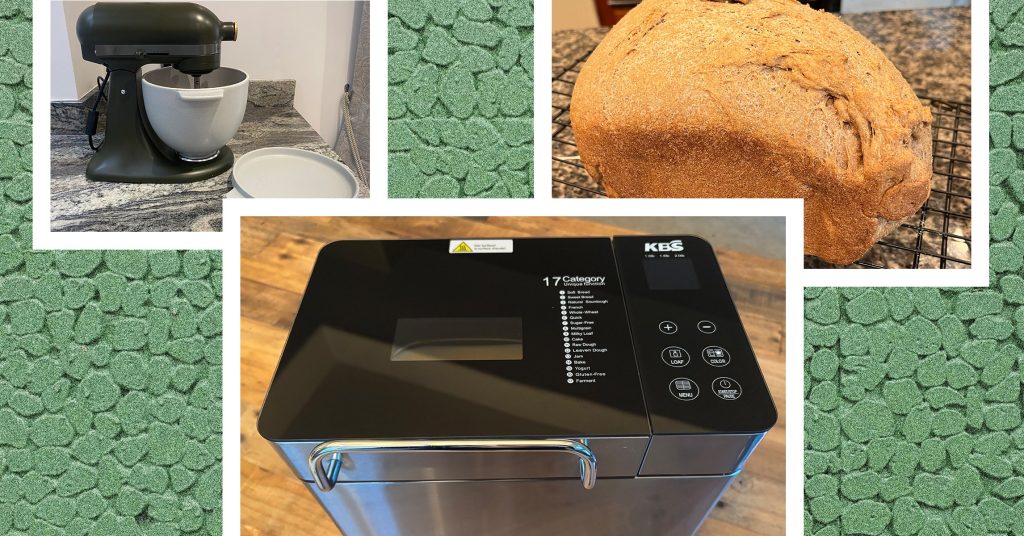
Bread makers are boxy in design with controls to the side of the opening where a bread pan sits. You simply load your ingredients for the bread recipe you want to follow and set it to run through the process—mixing and kneading the dough, letting it rise in its warm environment, and baking—all right inside the machine. Your standard bread recipe will include yeast, dry ingredients, fats, and water or liquids. Making sure your ingredients are loaded in the correct order is key to creating a well-risen loaf. We found that the order of ingredients differed depending on the bread maker’s recipe, so you should double-check this before you start—Breville suggests you load wet ingredients first, whereas the Panasonic model we tried suggested dry ingredients first, for example.
A collapsible kneading paddle inside should lower when the bread starts to bake; otherwise you’ll have to hook it out yourself when the bread is baked. An automatic dispenser can mix in other ingredients such as fruit, nuts, and seeds if needed, but don’t expect perfectly even results. Like Robert De Niro in Casino when he complains about the uneven number of blueberries in his muffin, you might be disappointed with this feature.
WIRED contributor Emily Peck is a journalist who’s been writing about food for 20 years. WIRED editor Kat Merck has been cooking and baking for almost 30 years and has line-edited and recipe-tested three bread cookbooks, including a James Beard Award winner.
With orders to eat freshly baked bread for breakfast, lunch, and dinner, we ignored our carb curfew and set about prepping loaves in the most popular bread makers we could find online. We made a standard white loaf inside each design and experimented with the extra settings where available. We rated each model on flexibility, performance, and convenience and assessed how tasty the results were.
What to Consider When Buying a Bread Maker
- Bread settings: Most bread makers offer a basic bread setting that lets you produce a standard 1-lb loaf (or 2 lbs in the case of the Zojirushi) in under four hours. You can often find a rapid setting for under two hours, but most bakers will confirm that patience is a virtue when it comes to producing quality results. You’ll also find more artisanal bread settings for recipes such as sourdough and French bread.
- Size and crust color: You can adjust the controls to get the perfect loaf size and crust color. This varies from model to model, averaging from a 1-lb loaf to anything up to 2.5 lbs.
- Timing: A delay-start timer is useful, as you can load your ingredients and set the bread maker to come on at a certain time—so you can wake up to fresh bread in the morning, for example. Some machines include a keep-warm setting that lasts up to an hour.
- Viewing window: If you want to be able to monitor your bread through the stages, choose a bread maker with a viewing window that allows you to see inside. Some designs such as the Breville bread maker also have a light that you can switch on and off as needed.
- Useful extras: Measuring your ingredients correctly is key to getting an expertly crafted loaf, so if you don’t have a separate weighing scale or measuring cup, look for a bread maker that comes with useful weighing accessories as part of the set. A measuring spoon for adding yeast tends to come as standard in the bread makers we tried, as does a quick-start recipe guide. Most models come with a separate recipe booklet or a recipe app to inspire you further.
- Nonstick coatings in your bread pan: Nonstick coatings aren’t generally considered a health risk unless they are significantly damaged or heated to extreme temperatures. (Most bread makers cook below 350 degrees Fahrenheit.) If you have any concerns about the nonstick coatings in your bread pan, look for those that are Teflon-, BPA- and PTFE-free for peace of mind.
6 Expert Tips for Baking Bread
Erik Fabian, cofounder of Sourhouse specialty sourdough tools, shares his top baking tips
- Weigh your ingredients for the most consistent baking results. Flour changes in volume depending on the humidity level of your environment.
- Spend five minutes learning “baker’s math” and the related concept of hydration. That means using ratio-based formulas instead of recipes based on the total amount of flour in a bread. A dough formula with 65 percent hydration is the same whether it is 1,000 grams of flour with 650 grams of water or 500 grams of flour and 325 grams of water. Baker’s math empowers you to scale and invent new breads on the fly.
- Explore sourdough baking. It’s an easy and fun way to incorporate fermented foods into your diet. And it will unlock new worlds of flavor. Making a sourdough starter is a project that takes as little as seven days.
- Be kind to yourself and take pride in your bread. Your most mediocre loaf will be way better than anything you buy at the store wrapped in plastic.
- Bake bread with kids. Baking is one of the most fun ways to be in the kitchen with kids. They love mixing up ingredients and smooshing doughs into pizzas and rolling out bagels. It is a simple way to teach basic math as well.
- Always make an extra loaf and give it away. It will make you the most popular person on your block.