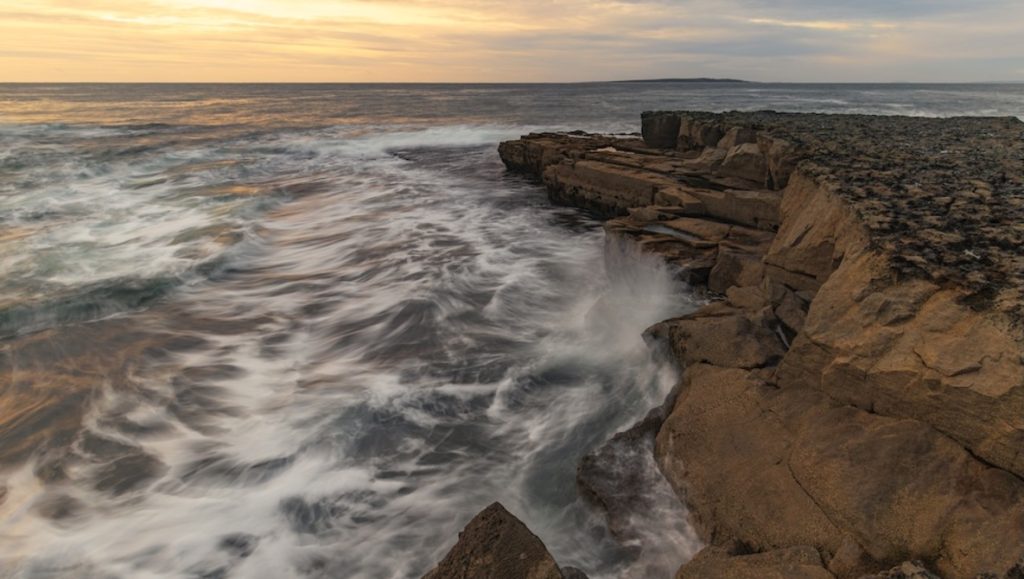
Seascape photography isn’t just about showing up at the right location with good light—it’s about knowing exactly when to press the shutter. Capturing the ocean in a way that feels dynamic and intentional isn’t just about where you stand—it’s about when you click the shutter and how long you leave it open.
I’ve spent countless hours at the coast, experimenting with different shutter speeds and observing how waves interact with the shoreline. The truth is, even with the best composition and light, if the timing is off, the shot won’t have the impact it could. The key is to understand the rhythm of the sea and time your exposure to match the movement of the water.

The Three Critical Moments in a Wave’s Motion
Every wave has a natural rhythm, and recognizing this cycle is the first step to improving your seascape shots. When I’m on location, I always pay attention to three specific moments:
- The Approach – This is when the wave builds, rolling toward the shore. It’s full of energy and texture, and capturing it at this stage can emphasize the sheer power of the sea.
- The Peak – The wave reaches its highest point, sometimes curling over just before crashing. Timing the shot here can create dramatic, impactful images, especially if you’re using a faster shutter speed to freeze water droplets mid-air.
- The Retreat – As the water rushes back out, it leaves behind swirling currents and smooth textures. This is one of my favorite times to shoot because it allows for creative long exposures that lead the eye through the frame.
Each of these moments creates a different feeling, and depending on the shutter speed you use, you can completely transform the look of your shot.

How Shutter Speed Transforms the Scene
One of the most important decisions I make when photographing seascapes is how long to leave the shutter open. Different speeds give very different results:
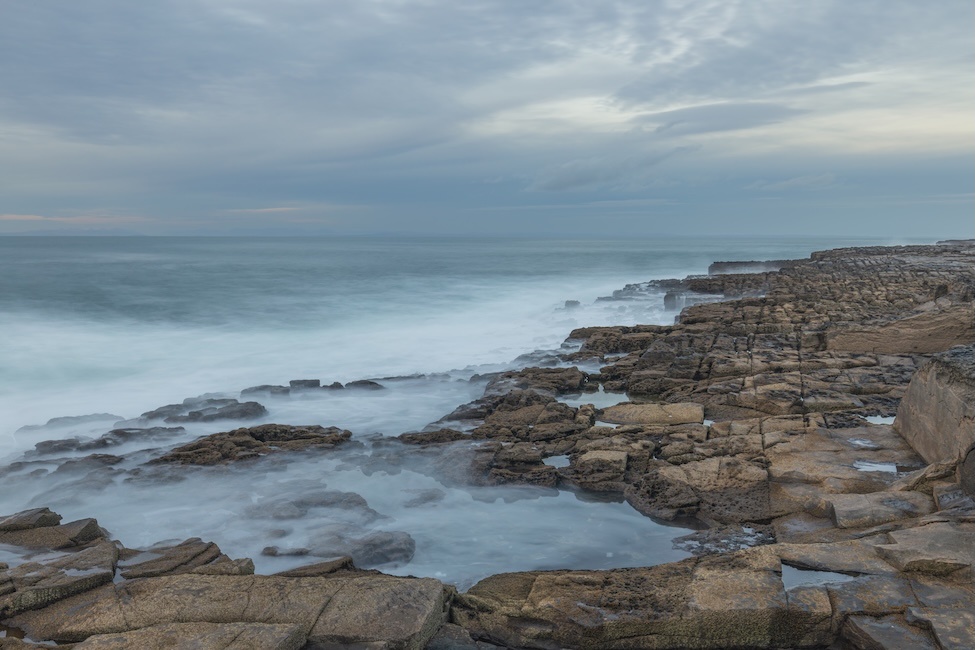
- 1/8s to 1/5s – This is my go-to when I want to show movement while keeping a bit of texture in the water. It’s great for capturing waves rushing over rocks, creating a sense of motion without excessive blur.
- 1/4s – A sweet spot for balancing motion and structure. The water softens slightly, but you still retain detail, making it a solid choice for mid-action shots.
- 1/2s – My preferred speed to shoot the water; however, it is worth noting that this depends on the speed of the water. If it is fast-moving, you will lose texture. This speed is best used for a retreating wave.
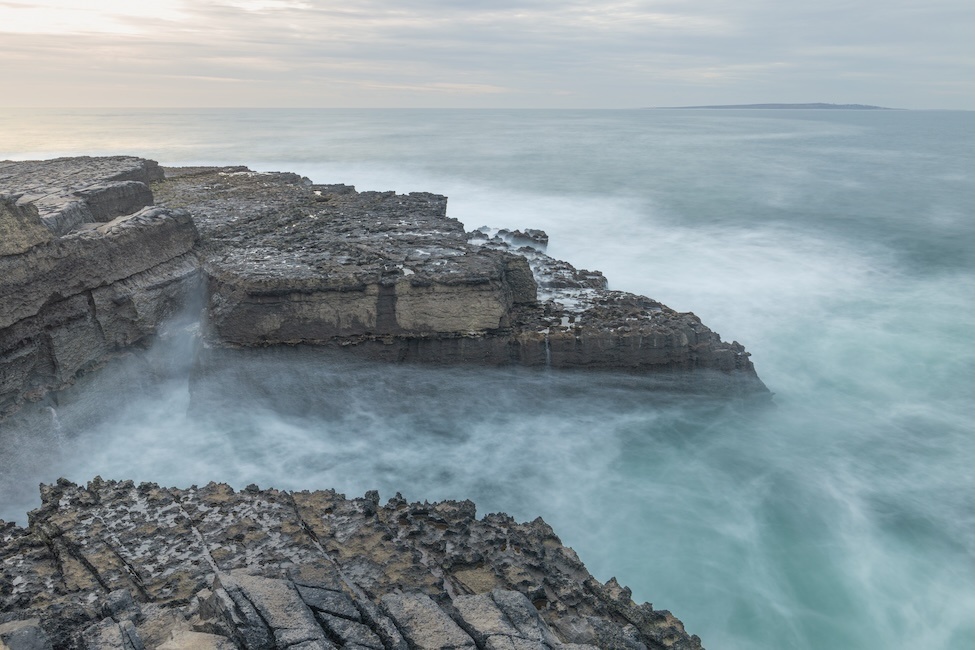
- 1s to 2s – This is where things start to get more abstract. The water takes on a more fluid, misty appearance, especially as it flows around foreground elements. I use this when I want to create leading lines with retreating waves.
- 10s to 30s – The long exposure effect. At these speeds, water turns to mist, and the scene becomes dreamlike. This works best when I have strong foreground interest—like a jagged rock or pier—to provide contrast against the smooth water.
The key isn’t just choosing the right shutter speed; it’s matching it to the right moment in the wave’s cycle. Shooting too early or too late can mean losing the effect you’re after.

Why a Tripod Is Non-Negotiable
No matter how steady you think your hands are, or even if your camera has IBIS, a tripod is essential for seascape photography—especially when working with slower shutter speeds. The constant motion of the waves and the unpredictability of the elements mean that even the slightest movement can introduce unwanted blur, and shooting handheld will mean you have differently composed shots for each one.
That said, not all tripods are suited for coastal conditions. From experience, here’s what I look for:
- Durability – Saltwater is brutal on gear, so I prefer carbon fiber tripods over aluminum, as they’re lighter and more resistant to corrosion.
- Secure Footing – If I’m shooting on wet sand, I make sure to press the tripod legs down slightly so they don’t shift mid-shot. On rocky surfaces, I take extra care to position the legs securely to avoid wobble.
- Added Stability – If it’s particularly windy, I will always have a hand next to or touching one of the legs. This means that if a gust of wind comes, I’m not going to be looking for Jacques Cousteau to help retrieve it.
Without a stable setup, even the best composition and timing can be ruined by unintended camera shake.
 Keeping Your Lens Clean
One of the biggest challenges of shooting at the coast is salt spray. It’s relentless. Even if you don’t notice it at first, over time, a fine mist will coat the front of your lens, reducing contrast and sharpness.
I’ve ruined more shots than I’d like to admit by not keeping my lens clean enough. Now, I make a habit of:
- Wiping my lens regularly – I always carry multiple microfiber cloths and use a clean one every few shots, usually in my left coat pocket, so I know where it is at all times.
- Using a lens hood – It doesn’t block all the spray, but it helps reduce how much mist hits the front element.
- Checking my lens often – I don’t assume the glass is clean just because I wiped it a few minutes ago. Conditions change fast at the coast, and it’s better to be proactive.
A dirty lens is an easy way to ruin a perfect shot, so keeping on top of this is just as important as any other setting.
 Filters
Filters are often useful in seascape photography, but I’m selective about when I use them.
- ND Filters – If I want to shoot long exposures during the day, I’ll use a 6-stop or 10-stop ND filter to slow down my shutter speed without overexposing the image. However, if the composition lacks strong elements, the effect can feel empty.
- Graduated ND Filters – These can help balance a bright sky with a darker foreground, but I don’t rely on them as much since I can blend exposures in post-processing.
- Polarizers – Useful for cutting glare and enhancing contrast, but I use them carefully with wide-angle lenses, as they can create uneven darkening across the frame.
Filters can be a great tool, but they’re not always necessary. I always assess the scene first and decide if they’ll enhance the shot before putting one on. As a rule of thumb, if I want to freeze the water, then I need no filters.
 Bringing It All Together
When I arrive at a location, I don’t immediately start shooting. Instead, I take a few minutes to observe:
- I watch the waves – I look at how they interact with the shoreline and identify the most interesting moments in their cycle.
- I compose my shot – First, I walk around handheld to see where the best spot is, then I place my tripod securely and frame my scene with a strong foreground element.
- I choose my shutter speed – Based on the effect I want, I adjust accordingly. My shutter speed is the main consideration depending on what I want to achieve with the water, and then the aperture and ISO come after that to get the shot.
- I time my shot carefully – I anticipate the wave’s motion and press the shutter at the right moment. Remember the different wave positions from above.
- I keep my lens clean – Regular checks ensure my images stay sharp. It’s a good habit to get into, even when you don’t think there is much spray or water in the scene.
Finally
Seascape photography isn’t just about finding the right location or getting lucky with conditions—it’s about understanding how water moves and how to time your shot perfectly. By paying attention to wave cycles, using the right shutter speed, and maintaining your gear properly, you’ll see a massive improvement in your images.
I filmed a video on this exact topic while shooting at the coast. If you want to see these techniques in action, along with real examples of how different shutter speeds affect the final image, check it out above.
Let’s continue the conversation in the comments below.